From the Archives: Furoshiki Tutorials

Furoshikis are a simple and fun way to package everyday items. Wrap up your lunch for daily use or a rare bottle of wine for a special occasion. If you take a brown paper bag to lunch on the daily, consider a more sustainable lunch bag and try one of these tutorials. A furoshiki is easy to wash and I think you’ll be pleasantly surprised how many different styles you can find to show your creativity. Don’t be shy- most fabric lovers will clap with glee for a hemmed square of carefully selected fabric and that joy can touch the hearts of all others because really it’s the thought that counts. Here are a few simple tutorials to get you started!
Each furoshiki in this tutorial is made from one yard of fabric, 36” x 36”. To create a square, cut white selvages off fabric (specific to Spoonflower printed fabric). Diagonally fold one corner to adjacent edge and cut excess fabric off. Hem around edge to create finished look and feel.

Blue Kona® Basket:
I used a favorite vintage tin for the base of this furoshiki. Not everyone has a basket or two laying around to tote around freshly picked apples, but we can make one for a trip to the farmer’s market. This furoshiki doubles as a centerpiece for fall dinners. For the fabric, I chose Ces't La Viv's Kitchen Stripes Blue printed on Kona® cotton from Spoonflower.
Steps:


1. First make a nest in your vessel. Place your base item; a tin, bread bowl, etc; in the center of the furoshiki and lay non-adjacent corners over the center of vessel. Smooth the layered fabric into the vessel create a space for what you want to carry.

2. Gather the fabric at the edge of the vessel where the remaining fabric is extended outward. This is where we are going to make handles. I pinched the excess fabric, then folded it to create a smooth junction. Twist the fabric up to the edge, too tight and the over wound fabric will twist and curl unattractively. Once you have twisted your fabric, tuck it under your vessel to keep from unraveling while you tackle the other side. Repeat on other side.

3. Bring both twisted handles of fabric together above the vessel. If you have twisted all the way to the tip, that’s okay- just make sure your have enough fabric on the tip to easily tie the handles together.

4. Tie with an overhand knot and tighten by pulling the loose edges and the twisted handles. This way your knot won’t pull out once you pick it up and apply some weight to it.

5. After toting around my apple basket, the handles loosened up and were no longer twisted....no worries! It’s still functional and that’s what counts.

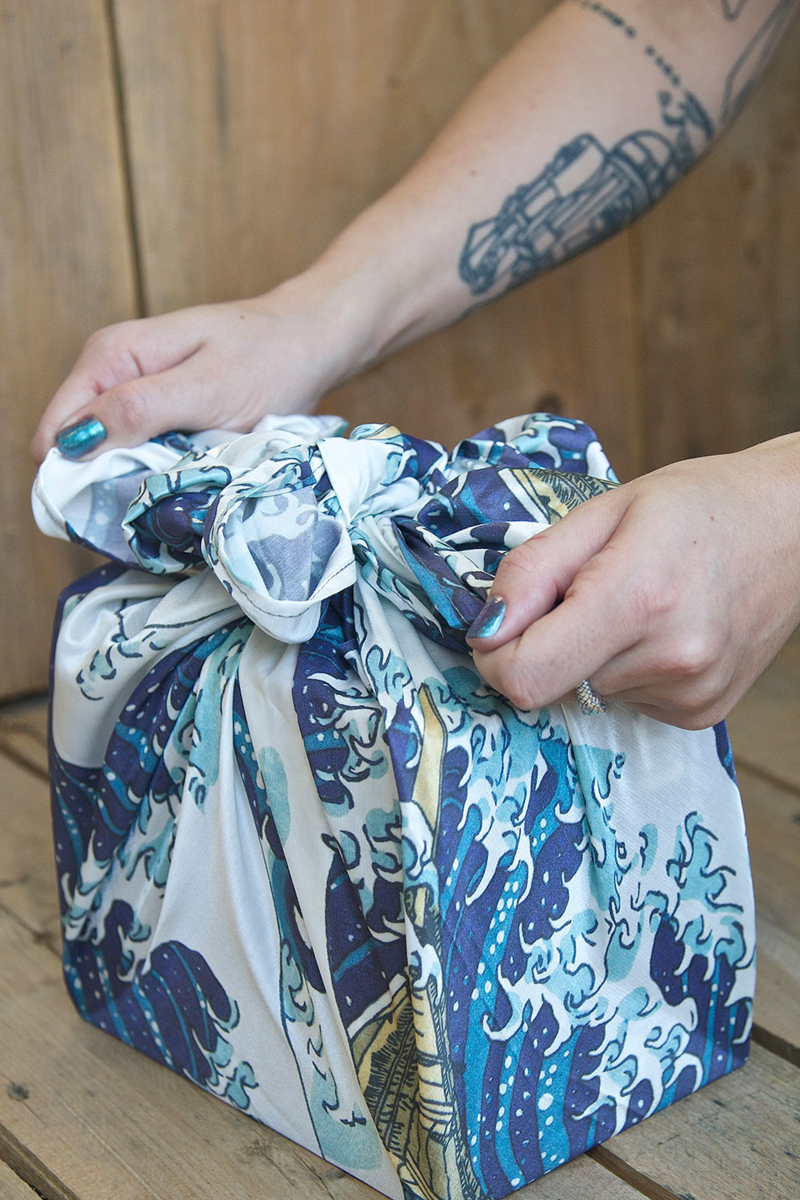
Silk Wave Gift Wrap
Original or digitally remastered, “The Gave Wave of Kanagawa” woodblock print, made by Hokusai, is a greatly recognizable Japanese design. It is loved by people who appreciate classic and historical art, and by contemporaries. Weaving Major's design The Endless Waves of Hokusai on cotton silk also lends this furoshiki to double as a scarf for the receiver of the gift.
Steps:

1. Place your gift diagonally in the center of the flat laying furoshiki. Bring the non-adjacent corners together and tie once only.

2. Bring the other two corners of furoshiki around to the top of your gift and tie once. We are layering the knots so they layer smoothly on top.

3. Bring the bottom tie to completion by tying the fabric edges over your second knot. Repeat with top tie, knotting it over the previous tie. You will be left with the corners of the furoshiki blooming out. To create a bow-like effect, simply tuck with excess fabric under each knot. Tighten knots and arrange fabric decoratively to your liking.

Washed Linen Bread Bag

Pre-washing the linen-cotton canvas gives it a relaxed feel and makes it easier to tie into small knots. This furoshiki features Sashiko: Hana-Zashi - Flower designed by Bonnie Phantasm.
Steps:

1. Fold furoshiki diagonally down the center, matching up corners.

2. Tie knots in each folded corner. These are going to be the bottom of our bag.

3. In the two top corners together to create the handle. This will be a bigger knot since the linen is so sturdy.

4. Open up your tied triangle and tuck the knotted corners inward to create a bubble of items to sit in your bag.
This will serve you as a re-useable and convertible bread bag. Tuck your rustic bread inside and simply brush any crumbs away when you are done.
Kona Bottle Wrap

Sure, you can give this one away with that fancy bottle of wine, or just wrap up your water bottle for a hike so you can hold onto it with its nifty handle. For this one, I used Dot Linen Gray and Yellow designed by Holli Zollinger.
Steps:

1. Place your bottle of choice in the center of your furoshiki square. Bring two non-adjacent corners together and tie once.


2. Wrap the loose corners around the bottle in opposite directions so you can bring them around and tie in a knot. I tend to situate my knot so it lays flat after my first attempt. Now that we have the body secure we and move on to the handle.

3. Working back to the top of the bottle where we have tied the corners just once, we are going to twist the loose edges like we did the Apple Basket. Twist the fabric, leaving 2-3 inches of the corner free to tie into the secure knot. Pull from both angles to insure it won’t slip out.

Check out this array of furoshiki wrap goodies! We are ready for a fall picnic in the apple orchard, or perhaps a quick snack during a hike. Get outside and take a cozily wrapped lunch with you!

You can see 5 furoshiki wraps in this image- the middle grey and teal wrap didn’t make it into the original blog post from 2014, see that hidden blog post here, due to copy right of the Totoro block print design. I still have that fabric so I might bring out that wrap again in the future, until then it’s being used for a variety of things around the house.
Stay tuned for more Furoshiki content with Spoonflower coming later in 2021.
In 2014, I shared traditional Furoshiki wrap techniques on the Spoonflower blog, my then employer. It’s been years since I left my factory job behind, but these Furoshiki Techniques, 700 years old from Japanese culture of public baths and gift giving, are still relevant as ever. The combination of textile love, reduced waste life style, and beautifying the simple things in life, Furoshiki can be used in all aspects of everyday life.
Photos Taken By Alex Craig in 2014, in the back hallway of the old Spoonflower printing facotry, still the photographer at Spoonflower. You can see we used all natural light and a pallet for the background of these photos, I was also sitting on the ground! Check out the updated version of this media on the 2019 collaboration I did with the Durham based digital printing company.